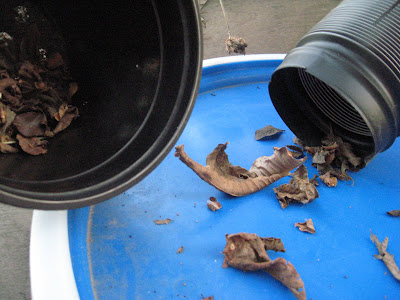


Okay, here are the two rain barrels. The first one was made by Manly. He used a jigsaw to cut the top opening for the water to come into the barrel. It was made the same shape as the down spout diverter (that brown tube) . He used a pvc tap and drilled the hole for it slightly smaller than the tap itself. Then he screwed it in and sealed it with silicone. I messed the seal up and resealed it with Gorilla Glue. It has never leaked again. This one does not have an overflow. You should drill an overflow hole at the top on one side to allow the excess water to flow out. This one just bubbles out the top and doesn't seem to be a problem. The gutters that feed this barrel are fitted with gutter guards.
Make sure you have either gutter guards or some kind of screen to keep out dirt and debris. The last picture shows the one gallon container with a screen cut out and fitted into the bottom. As you can see it works just fine keeping stuff out. The gutters feeding the second barrel are not covered with gutter guards so it needs some sort of filter. I have seen other barrels that have an open top that is covered with screen. That works fine too.
The second barrel was actually put together by our master gardener rainwater harvesting specialists. I think there is a coupling behind the water tap. It also has the overflow hole.
I am equally happy with each barrel. There are lots and lots of videos that explain this in a lot more detail than I have here. Rather than getting all technical and doing math (which I would get wrong), I suggest you google "make your own rain barrel" and pick a video to watch.
Remember though, this does not have to be all complicated. A barrel with a tap, gutters and a way to keep out mosquitoes is all you need. If you can use a drill, you can do this. They can be dressed up with pickets or 1x1 cedar boards.


Very interesting- I'll have to try it. I've been putting off getting a rain barrel as they are expensive (it's on the list). I think I have a resource for free food grade barrels!
ReplyDeleteIn case anyone is interested, I made my rain barrels following these instructions from Garden Gate magazine (I got the barrels free from my water treatment plant and the hardware for both rain barrels cost $20. I'd put the main nozzle lower down if I were doing it again, and raise the barrel higher to get a bucket under it.
ReplyDeleteThese look great, Debbi! We have the screens over ours, which means you have to remember to dump off all the gunk regularly, but it works for us. Count on Manly to come up with his own (highly functional) design!
ReplyDeleteThank you for this very helpful post!!
ReplyDeleteThey look really good. Plus point for the DIY.
ReplyDelete-MrBrownThumb
Tessa, I'd love to get some for free.
ReplyDeleteMonica. Thanks for the link. I put my barrels on large cinder blocks. Works great.
OFB, Thanks and Manly is already improving on the design for the next three.
You are welcome Ginger.
Thanks Mr. BrownThumb
We were going to attempt to do this last year but never got around to it. I could really use a rain barrel in the summer here but not so much in the winter when we are hit with literally foot upon foot of rain! I have often wondered how quickly I would go through the water they collect...
ReplyDeleteCynthia, Mine last about a week, although I save some for my water garden and pitcher plants.
ReplyDelete